
Introduction
Why Red Velvet Cake Ice Cream is a Luxurious, Must-Try Dessert
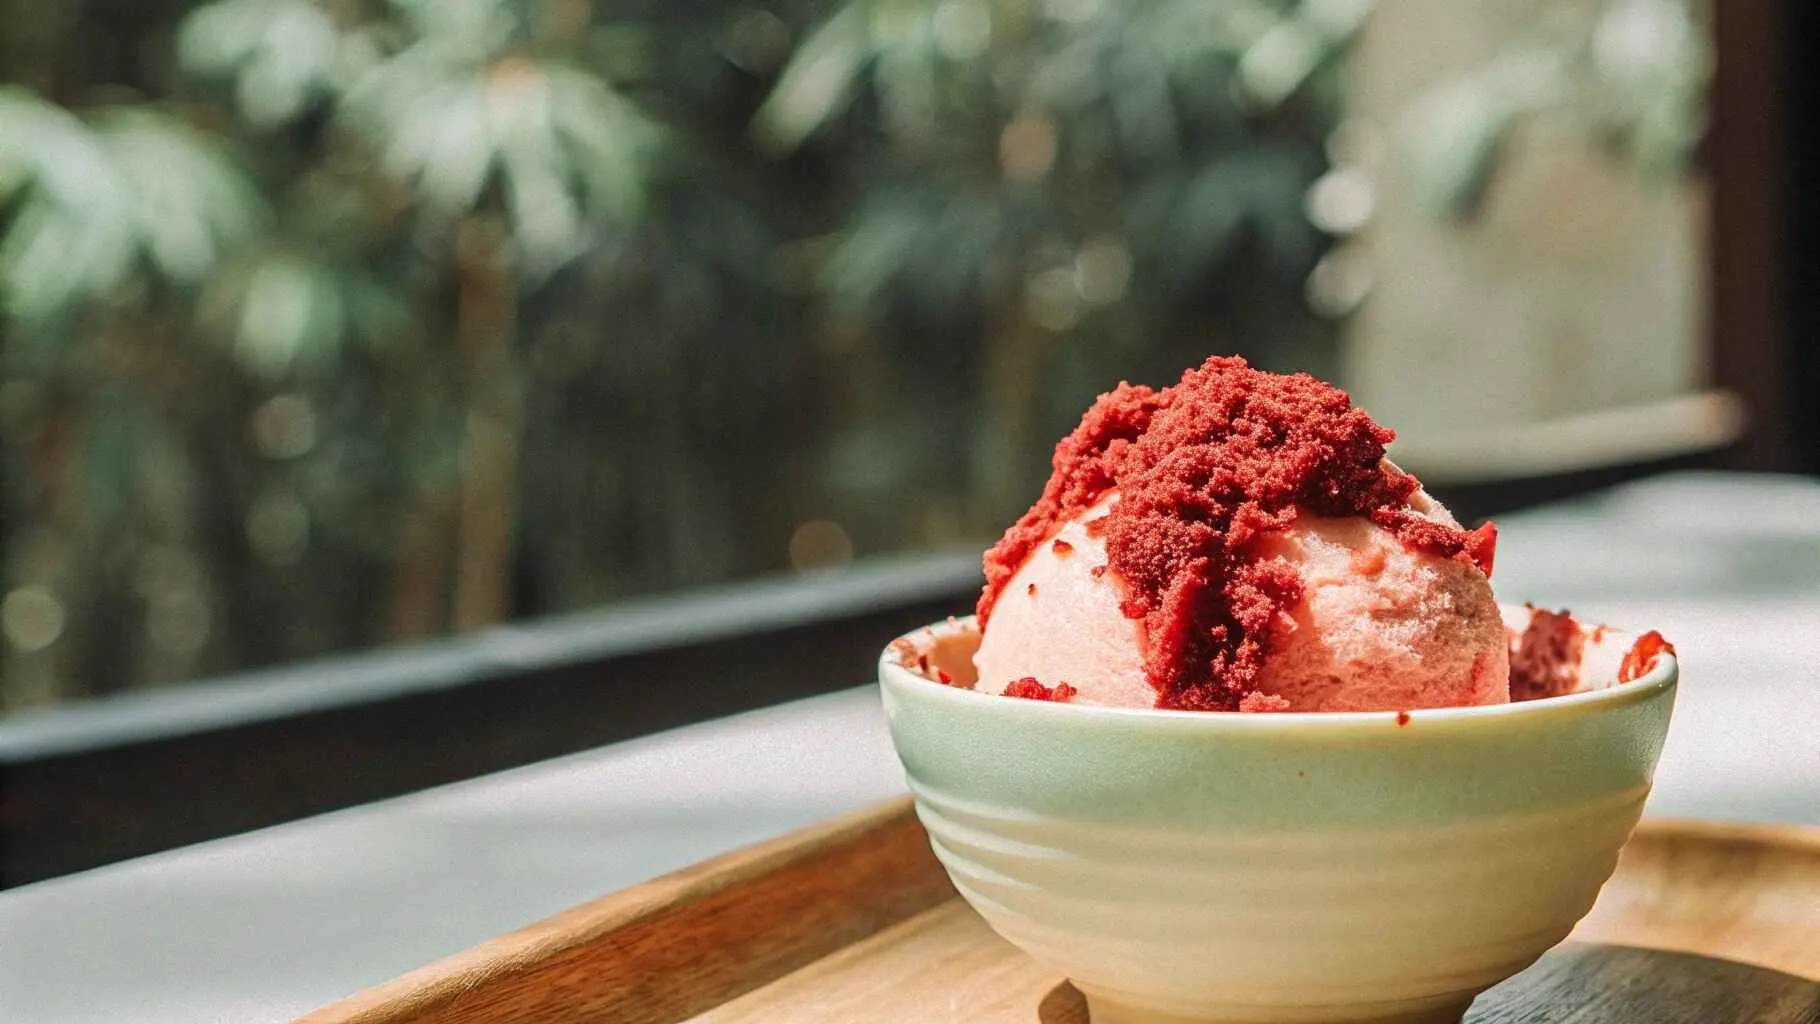
Imagine the indulgent richness of classic red velvet cake swirled into a creamy, velvety scoop of homemade ice cream. The smooth, luscious texture, combined with delicate cocoa undertones and a subtle tang, makes every bite an unforgettable experience.
Red velvet cake ice cream is more than just a dessert—it’s a celebration of flavors and textures. With its vibrant red hue and signature sweet-cream taste, this frozen treat is perfect for:
- Holidays & Special Occasions – Whether it’s Christmas, Valentine’s Day, or Thanksgiving, this dessert brings elegance to any table.
- Birthdays & Gatherings – Serve it alongside a slice of red velvet cake or transform it into decadent ice cream sandwiches.
- Gourmet Indulgence at Home – Skip the store-bought versions and enjoy a homemade creation that’s smoother, richer, and packed with real ingredients.
If you love red velvet cake, this ice cream will take your dessert game to the next level. Ready to make your own? Let’s dive in!
Table of Contents
Why You’ll Love This Recipe
Red velvet cake ice cream isn’t just another frozen dessert—it’s an experience! Whether you’re a red velvet fanatic or an ice cream lover looking for something new, this recipe is guaranteed to impress. Here’s why:
1. A Unique Twist on Classic Red Velvet Cake
This recipe transforms the beloved red velvet cake into a rich and creamy ice cream. With velvety smoothness, delicate cocoa notes, and the signature tangy-sweet balance, every spoonful feels like a bite of cake and frosting in one.
2. No Artificial Flavors—Just Real, High-Quality Ingredients
Unlike many store-bought versions that rely on artificial flavors and preservatives, this homemade ice cream is made with real dairy, fresh eggs, and homemade or bakery-style red velvet cake. The result? Pure, indulgent flavor in every bite.
3. Perfectly Balanced Sweetness and Tanginess
Red velvet cake is known for its unique flavor—a delicate balance between mild cocoa, a hint of vanilla, and a subtle tang from buttermilk or cream cheese. This ice cream captures all those flavors beautifully, ensuring it’s never too sweet or overwhelming.
4. No Ice Cream Machine? No Problem!
Don’t have an ice cream maker? You can still enjoy this treat with an easy no-churn method using whipped cream and condensed milk. Whether you go the traditional route or the shortcut method, you’ll still get that dreamy, creamy texture.
This red velvet cake ice cream is a show-stopping dessert that’s just as fun to make as it is to eat. Get ready to impress your family, friends, and—most importantly—your taste buds!
Ingredients Table
| Ingredient | Quantity |
|---|---|
| Heavy cream | 2 cups |
| Whole milk | 1 cup |
| Granulated sugar | ¾ cup |
| Cream cheese | 4 oz (softened) |
| Vanilla extract | 2 tsp |
| Unsweetened cocoa powder | 1 tbsp |
| Red food coloring | 1-2 tbsp |
| Red velvet cake (crumbled) | 1 cup |
| Egg yolks | 4 large |
| Cornstarch | 1 tbsp |
| Salt | ¼ tsp |
Step-by-Step Instructions
1. Preparing the Ice Cream Base
- In a medium saucepan, combine heavy cream and whole milk over medium heat.
- Whisk in granulated sugar, cocoa powder, and cornstarch, stirring until fully dissolved.
- In a separate bowl, whisk egg yolks until smooth.
- Gradually temper the yolks by slowly pouring in a small amount of the warm milk mixture while whisking continuously.
- Return the tempered yolk mixture to the saucepan and cook over low heat, stirring constantly, until the mixture thickens enough to coat the back of a spoon.
2. Infusing the Red Velvet Flavor
- Remove the saucepan from heat and whisk in cream cheese, vanilla extract, and red food coloring.
- Stir until fully incorporated and smooth, ensuring a uniform red velvet flavor throughout.
3. Chilling and Churning
- Strain the mixture through a fine-mesh sieve into a clean bowl to remove any cooked egg bits.
- Cover with plastic wrap, pressing it directly onto the surface to prevent a skin from forming.
- Refrigerate for at least 4 hours (or overnight for best results).
- Once chilled, pour the mixture into an ice cream maker and churn according to the manufacturer’s instructions until thick and creamy.
4. Adding the Cake Pieces
- During the last 5 minutes of churning, fold in crumbled red velvet cake, ensuring even distribution without overmixing.
5. Freezing and Serving
- Transfer the churned ice cream to an airtight container and smooth the top.
- Cover with parchment paper or plastic wrap to prevent ice crystals from forming.
- Freeze for at least 6 hours or until firm.
- Scoop, serve, and enjoy the rich, creamy, and decadent Red Velvet Cake Ice Cream!
Red Velvet Variations to Try
Want to take your red velvet cake ice cream to the next level? Try these delicious variations to customize your treat:
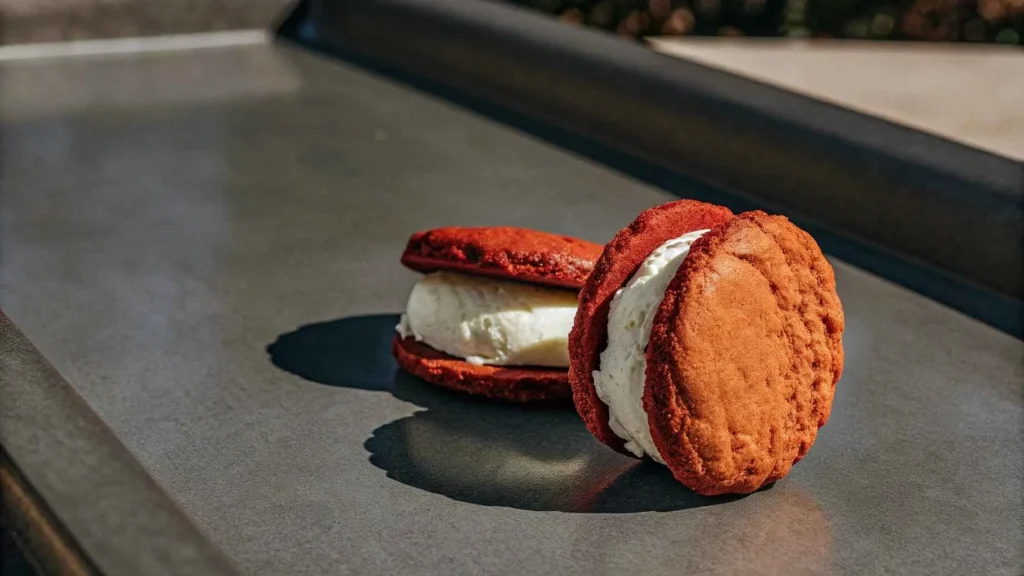
1. Red Velvet Cookies with Cake Mix Ice Cream Sandwiches
- Bake soft red velvet cookies using a cake mix for an easy shortcut.
- Scoop a generous portion of red velvet cake ice cream between two cookies.
- Press lightly, then freeze for 30 minutes to firm up before serving.
- Perfect for a fun, handheld dessert!
2. Red Velvet Pound Cake Swirl Ice Cream
- Instead of crumbling regular cake, add chunks of red velvet pound cake to the ice cream.
- For a beautiful swirl effect, layer cream cheese frosting or a sweetened cream cheese mixture between layers of ice cream before freezing.
- This version creates a richer, more decadent texture with buttery pound cake goodness.
3. Gluten-Free Red Velvet Cake Ice Cream
- Make this dessert gluten-free by using gluten-free red velvet cake crumbs.
- Opt for a gluten-free cake mix or bake from scratch using almond flour or a gluten-free all-purpose blend.
- The result? The same delicious red velvet flavor, but safe for those with gluten sensitivities!
Each of these variations adds a new twist to your classic red velvet cake ice cream—try one or experiment with all three!
Storage Tips
To keep your red velvet cake ice cream fresh and creamy, follow these simple storage tips:
1. Airtight Container
- Store the ice cream in an airtight container to prevent air from affecting its texture and flavor.
- This will help preserve the smooth, velvety consistency for a longer period.
2. Prevent Ice Crystals
- To avoid the formation of ice crystals, place a sheet of parchment paper or plastic wrap directly on top of the ice cream before sealing the container.
- This will create a barrier, ensuring a creamier texture when you scoop it later.
3. Use Within 2 Weeks
- For the best flavor and consistency, enjoy the ice cream within 2 weeks. After that, it may start to lose some of its texture and flavor.
By following these tips, you can enjoy your homemade red velvet cake ice cream at its best for as long as possible!
Other Red Velvet-Inspired Recipes
Here are some creative red velvet-inspired recipes to try, each with its own unique twist on the classic flavor:
Red Velvet Cookies with Cake Mix
Ingredients Table
| Ingredient | Quantity |
|---|---|
| Red velvet cake mix | 1 box |
| Egg | 1 large |
| Vegetable oil | ½ cup |
| All-purpose flour | 1 cup |
| Baking soda | 1 tsp |
| Salt | ¼ tsp |
| Cream cheese (softened) | 4 oz |
| Powdered sugar | 1 cup |
| Vanilla extract | 1 tsp |
Instructions
- Preheat oven to 350°F (175°C).
- In a large bowl, combine red velvet cake mix, egg, vegetable oil, and flour. Stir until smooth.
- Scoop dough onto a baking sheet lined with parchment paper, and bake for 10-12 minutes.
- Let the cookies cool. Meanwhile, prepare the cream cheese frosting by mixing softened cream cheese, powdered sugar, and vanilla extract.
- Once cookies are cooled, spread the frosting on top and sandwich two cookies together.
Variations
- Red Velvet Cake Mix Ice Cream Sandwiches: Layer this ice cream between the red velvet cookies for an indulgent dessert.
- Red Velvet Cake Pops: Crumble the baked cookies, mix with frosting, and form into pops for a fun treat!
Red Velvet Pound Cake
Ingredients Table
| Ingredient | Quantity |
|---|---|
| All-purpose flour | 2 ½ cups |
| Baking powder | 1 tsp |
| Salt | ¼ tsp |
| Unsalted butter | 1 cup |
| Granulated sugar | 2 cups |
| Eggs | 4 large |
| Sour cream | 1 cup |
| Red food coloring | 2 tbsp |
| Cocoa powder | 1 tbsp |
| Vanilla extract | 2 tsp |
Instructions
- Preheat oven to 350°F (175°C). Grease and flour a bundt pan.
- In a bowl, whisk together flour, baking powder, and salt.
- In a separate bowl, cream butter and sugar until light and fluffy. Add eggs one at a time, mixing well after each.
- Add sour cream, cocoa powder, vanilla extract, and red food coloring. Stir to combine.
- Gradually add the dry ingredients to the wet ingredients and mix until smooth.
- Pour batter into the prepared pan and bake for 45-50 minutes or until a toothpick comes out clean.
Variations
- Red Velvet Cream Cheese Filling: Add a layer of cream cheese filling in the middle of the pound cake for extra richness.
- Red Velvet Pound Cake Trifle: Layer chunks of pound cake with whipped cream, fresh berries, and a drizzle of chocolate sauce.
Gluten-Free Red Velvet Cake
Ingredients Table
| Ingredient | Quantity |
|---|---|
| Gluten-free flour blend | 2 ½ cups |
| Baking soda | 1 tsp |
| Salt | ½ tsp |
| Unsweetened cocoa powder | 2 tbsp |
| Butter (softened) | ½ cup |
| Granulated sugar | 1 ½ cups |
| Eggs | 3 large |
| Buttermilk | 1 cup |
| Red food coloring | 2 tbsp |
| Vinegar | 1 tbsp |
Instructions
- Preheat oven to 350°F (175°C). Grease and flour two 9-inch cake pans.
- In a bowl, mix gluten-free flour blend, baking soda, salt, and cocoa powder.
- In another bowl, cream together butter and sugar until fluffy. Add the eggs one at a time, mixing well after each.
- Add buttermilk, vinegar, and red food coloring. Stir to combine.
- Gradually add the dry ingredients into the wet ingredients and mix until smooth.
- Pour batter into prepared pans and bake for 30-35 minutes. Let cool completely before frosting.
Variations
- Gluten-Free Red Velvet Cupcakes: Divide the batter into cupcake tins and bake for 18-20 minutes for a fun, bite-sized treat.
- Gluten-Free Red Velvet Cake Pops: Crumble the cooled cake, mix with frosting, and shape into cake pops.

These red velvet variations give you endless possibilities for celebrating the classic flavor in new and exciting ways. Whether you’re baking cookies, cakes, or ice cream, you’ll enjoy the versatility of red velvet in every delicious form!
Common Mistakes & How to Avoid Them
Making red velvet cake ice cream at home can be tricky, but avoiding these common mistakes will help you achieve the perfect creamy, flavorful treat.
1. Too Icy? Ensure Your Base is Well-Chilled Before Churning
- Mistake: If the ice cream turns out too icy or grainy, it may be because the base wasn’t chilled enough before churning.
- How to Avoid: After preparing the ice cream base, refrigerate it for at least 4 hours (or overnight for best results). This helps the mixture reach a colder temperature before being churned, ensuring a smooth, creamy texture.
2. Not Creamy Enough? Use High-Fat Dairy and Don’t Skip the Eggs
- Mistake: If your ice cream is more like frozen milk than a rich, creamy dessert, it’s likely because of a lack of fat and emulsifiers.
- How to Avoid:
- Use high-fat dairy such as heavy cream and whole milk—this will provide the rich texture and mouthfeel you’re aiming for.
- Egg yolks are crucial to creating a custard-style base, which adds creaminess and helps prevent an icy texture. Don’t skip this step!
By taking care in chilling your base and using the right ingredients, you’ll avoid these common pitfalls and create the perfect red velvet cake ice cream every time.
Frequently Asked Questions
1. What is Red Velvet Ice Cream Made Of?
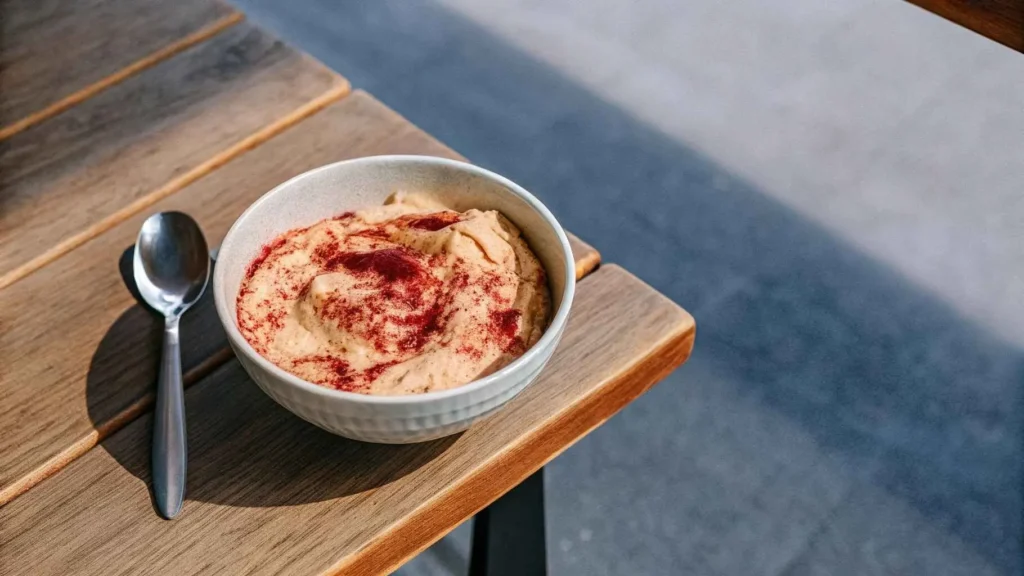
Red velvet ice cream is made from a rich, creamy base of heavy cream, whole milk, and sugar, with the addition of unsweetened cocoa powder for that signature cocoa flavor. It also includes cream cheese to capture the tangy taste associated with red velvet cake. Red food coloring gives the ice cream its vibrant red hue, and crumbled red velvet cake is often added for texture and flavor, creating a decadent and smooth treat.
2. What Ice Cream Do You Serve with Red Velvet Cake?
Red velvet cake pairs wonderfully with ice cream flavors that complement its rich texture. You can serve it with cream cheese ice cream, vanilla ice cream, or even chocolate ice cream. The tangy and sweet flavors of the red velvet cake contrast beautifully with the cool, creamy richness of these ice cream choices. Red velvet cake ice cream itself is also an excellent pairing, enhancing the red velvet experience!
3. What Flavour is Red Velvet Ice Cream?
Red velvet ice cream combines the flavors of chocolate and vanilla with a subtle tanginess from cream cheese. The cocoa base gives it a rich, slightly bitter flavor, while the cream cheese adds a smooth, sweet-tart note, making it the perfect frozen version of red velvet cake.
4. Is Red Velvet Cake Ben and Jerry’s Discontinued?
Yes, Ben & Jerry’s Red Velvet Cake Ice Cream has been discontinued. It was a fan-favorite, but unfortunately, it’s no longer available. However, you can easily make your own red velvet cake ice cream at home with this recipe to satisfy your cravings!
Conclusion
Red velvet cake ice cream is the ultimate gourmet dessert that you can easily make at home. It’s the perfect blend of rich, creamy ice cream and the beloved flavors of red velvet cake—complete with a touch of cream cheese, cocoa, and a burst of vibrant red color. Whether you’re celebrating the holidays, a special birthday, or simply treating yourself, this dessert is sure to impress.
With simple ingredients and easy-to-follow instructions, you can enjoy a luxurious frozen treat that will rival any store-bought version. Don’t forget to try different variations like ice cream sandwiches or a pound cake swirl for even more indulgence!
Make this red velvet cake ice cream and discover why it’s the perfect sweet treat for any occasion.